
Before opening setup
Choose the correct workspace, confirm access to Vulcan Voice, and gather your company name, service list, service areas, office or handoff phone, pricing language and booking policy. Have a real person ready to receive a test transfer. Connect the booking account in the same workspace before selecting it in setup.
Open Apps → Vulcan Voice AI. Use the agent-management view to start a new setup, or select an existing voice agent and choose Configure Agent. Some internal links use “ai-csr”; they open the same Vulcan Voice setup rather than a different product.
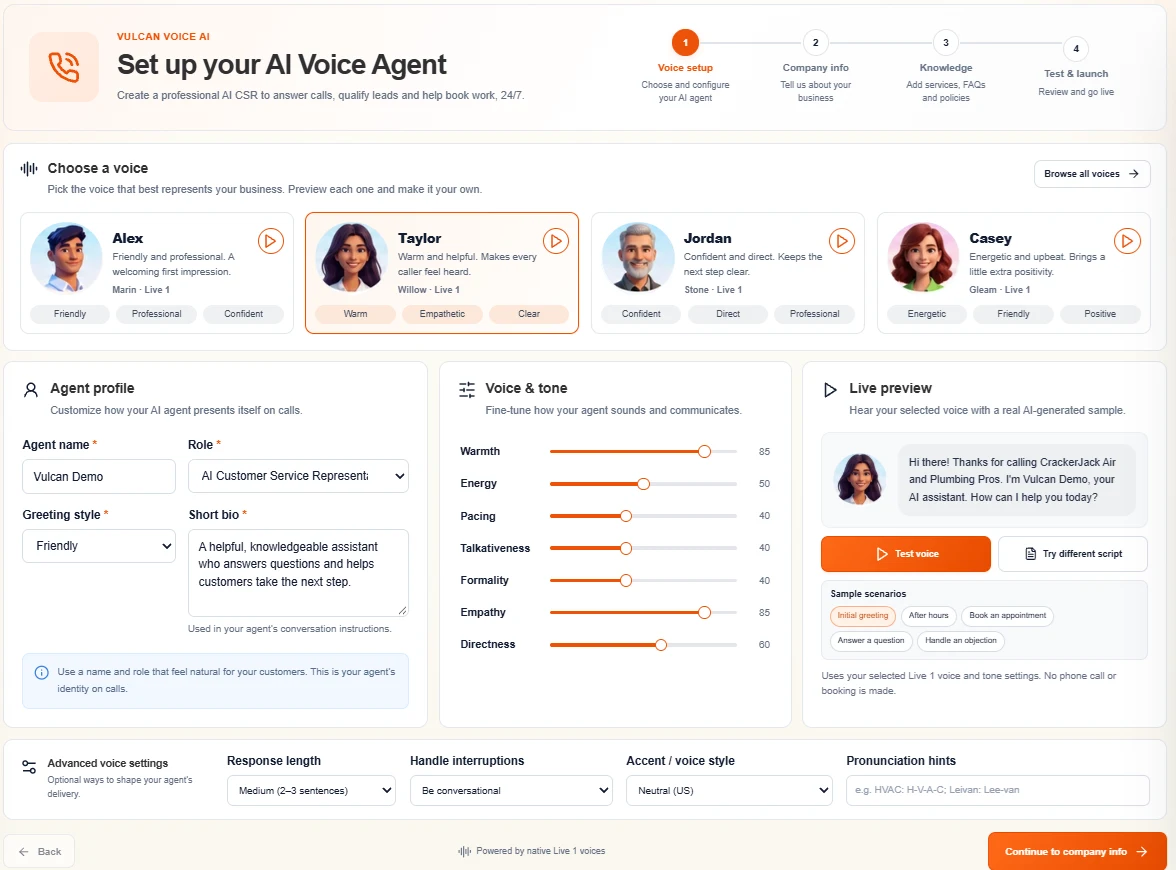
1. Voice setup
Choose Alex, Taylor, Jordan or Casey, or expand Browse all voices. Set Agent name, Role, Greeting style and Short bio. Adjust Voice & tone, then use Test voice to hear a generated sample. Try different script lets you test your own short sample; it does not place a phone call or create an appointment.
Use Continue to company info to save and advance. Watch the Saved or Unsaved changes indicator. A preview is not a save.
2. Company info
Enter Company name, an Agent / deployment label, Office / handoff phone, Website, service-area cities and ZIP codes, After-hours instructions and Opening greeting. Choose the starting language. Review the AI introduction and recording-disclosure setting.
Select your Booking system from the workspace connections, or leave TradeVulcan lead capture. Save company changes first, then choose Save booking system. For ServiceTitan, use Configure ServiceTitan booking mappings before relying on live booking.
3. Knowledge
Fill Services offered, Services not offered, Pricing and fees, Booking policy, Frequently asked questions and business knowledge, and Special instructions. Put the authoritative version of each policy in one place. Use short, direct answers and explicit boundaries rather than a long marketing brochure.
4. Test & launch
- Save all pending edits.
- Choose an Existing voice line and select Assign voice line. Creating a new local number is a separate, billable action with its own confirmation.
- Select Check connection and wait for the saved result. Use Refresh status to reload it.
- Review the checklist, including service knowledge, handoff number and assigned answering line.
- Read and select the activation authorization, then choose Activate voice agent.
- Call the assigned line directly. Verify a normal request, a correction and a handoff before forwarding your main business number.
Finish with evidence
Open the saved call in history and inspect its lead or CRM result. Confirm the office received the transfer and that your number routing behaves as planned. Activation turns on the configured agent; forwarding your existing number is a separate routing step.
After editing a live agent, Save changes can affect later calls. Keep a copy of the previous instructions, change one thing at a time and repeat the relevant tests.