
Before you begin
Have the correct TradeVulcan workspace, access to Web Spark, and permission for the actions you plan to perform. Editing, generation, billing and publication are separate permissions. Prepare your business name, public phone, actual services, service territory, logo and approved photographs. Identify the person who can approve costs and the person who controls your domain.
You do not need to move an existing domain or cancel your current website just to prepare a private project. Leave the existing website and email services in place while you build and review.
1. Create the website project
- Open Web Spark in the dashboard.
- Confirm the workspace and choose New website, or Create your first website on an empty list.
- Enter the business or website name, trade, services, service areas and the outcome you want.
- Choose an available starting design and complete the creation action shown on screen.
- Open the new website with Open builder. Check its name before continuing.
If the creation option is unavailable, do not make another account or project to bypass it. Ask the workspace owner to confirm app availability, your assignment and permissions.
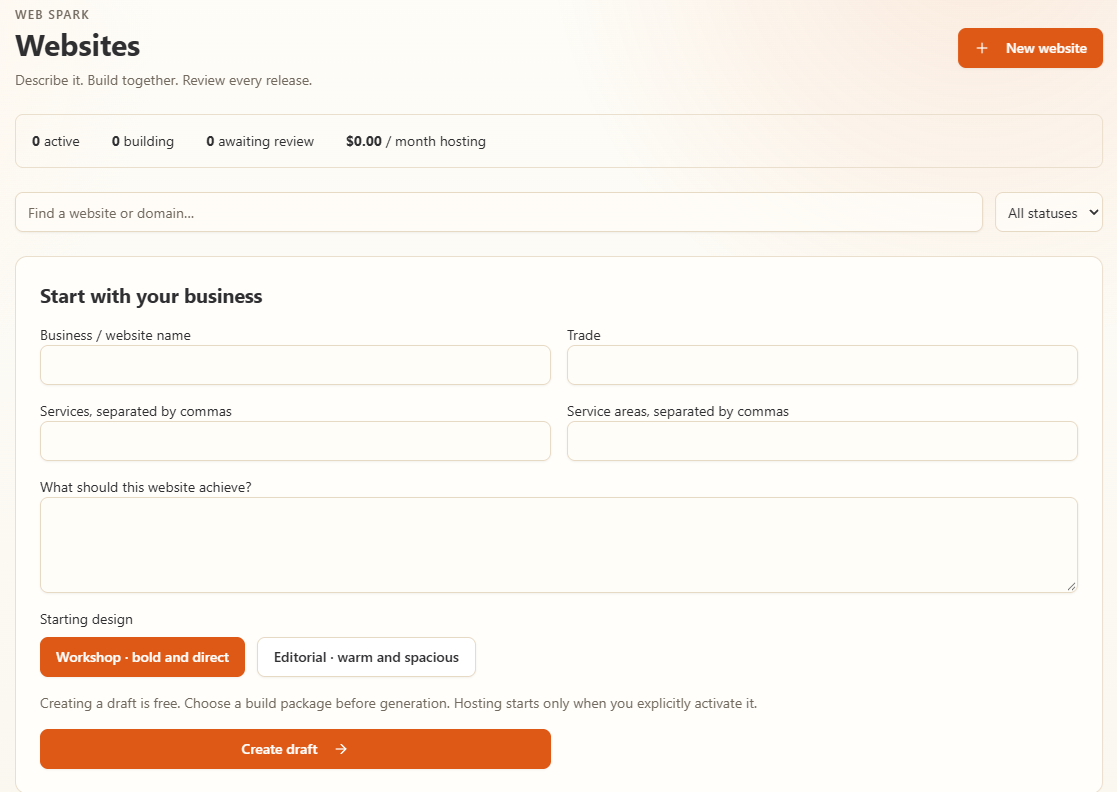
Create the website draft from its business details. Draft creation, generation purchases, and hosting activation are separate steps.
2. Complete setup and review purchases
When Website setup appears, work through its numbered steps and use Save and continue. Review the proposed sitemap, package, and any optional assistance before approving the order. A hosting preference does not itself start a recurring subscription; hosting activation and its billing are handled separately.
Use the exact checkout review to understand what is being purchased. A checkout success URL is not a substitute for a settled order in Billing. After payment, return to the same project. Do not purchase again because one tab has not refreshed.
3. Finish Discover
In Studio, open Discover. Describe the brand feeling, target customers, priority services and main next step. Confirm public contact details and add evidence for claims such as warranties or offers. Choose Save inputs before preparing the plan. The business brief guide gives a practical example.
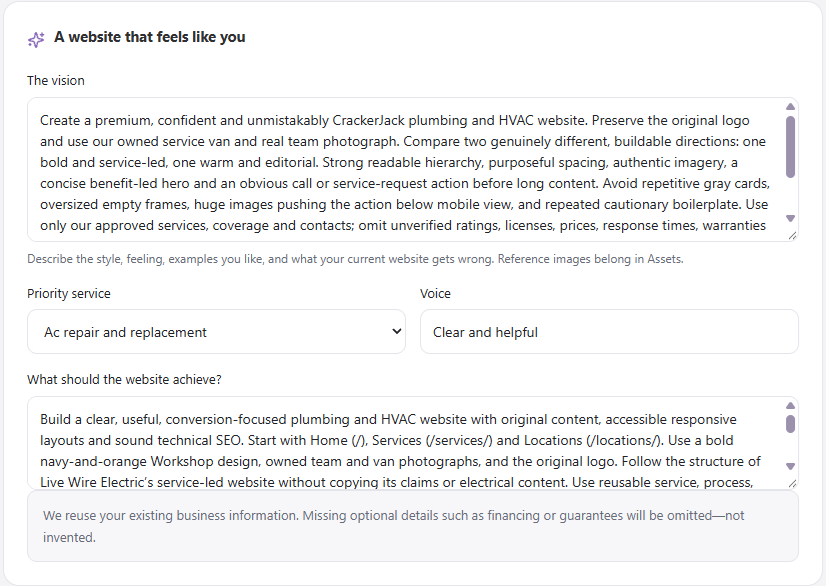
Describe the style, audience, priority service, and desired next step. Save the inputs before preparing the site plan.
4. Review Plan, then Design
Choose Prepare my site plan. Review services, locations, page purpose and package scope. Approve only the architecture you want. In Design, inspect the available proposal, including mobile presentation, before choosing Approve this direction. Read the scope: approving can start ready build work.
Specific feedback works better than “make everything better.” Try: “Keep the logo and public phone. Use a warmer background, larger service buttons and less text above the first action.”
5. Check the first saved work
Open Build, choose a saved page and use desktop, tablet and phone controls. Answer agent questions and review the saved result. Use Review for findings and Launch only when the selected work is ready. Completing setup does not mean the website has been published.
You are ready to continue when
- The project and workspace names are correct.
- Your business details, exclusions and public contact information are saved.
- The plan and design approval match the work you want generated.
- You can open saved pages and understand any outstanding questions.
- The responsible person understands the separate build, usage, hosting and domain charges.
When setup stops
For an access message, ask the owner to check permissions. For an approval request, open the requested review instead of repeating the prompt. For a payment or generation state that remains pending, retain the order or task reference and use the troubleshooting guide. Avoid repeated clicks that could create confusing requests.